Teddy Bear Burp Cloth
I have decided to share my Burp Cloth Tutorial, even know there are many tutorials for baby burp cloths - i wanted one that i could use scraps of material, ribbon and other stuff i have laying around the house.
Budget Materials include:
- Scrap Towelling material ( or a old but still useable towel )
- Brown and Tan coloured Felt from the dollar store
- Scrap Coloured/ Patterned material
- Whatever colour thread you want
- Ribbon (optional for hanging)
- Pop studs (optional if you want the bear head to be removable)
- Buttons (optional)
Step 1. Cut 2 bear Face shapes - This is the shape i used.
 |
| Teddy Head |
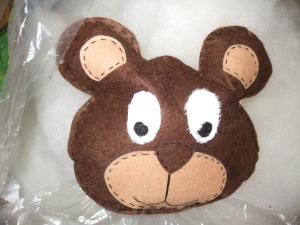
Step 2. Stitch the face onto the front of the bear face - I used half ovals in the ears, ovals for eyes and for the mouth area and other shape for the nose - i just kept adjusting til i figured out what shape i wanted.
On the back you can stitch one side of the pop studs (optional only if you want the head to be removable - i do so i can machine wash the towel)
 |
| Placing the face on to get the right placement before stitching. |
Step 3. After stitching the face on i stitched the 2 head shapes together and before closing the gap between the ears i put a light layer of stuffing in to puff it up.
 |
| Stuffing the head between the ears - I like the homely look of the stitching so i used black to make it stand out. |
Step 4. I used ribbon folded over to make a loop (so i can hang it) - make sure to finish the ends of the ribbon so it doesnt unravel. I used a lighter to lightly singe the ribbon ends. Putting the loop in the gap i left open to stuff the head... i finished the head by stiching it closed.
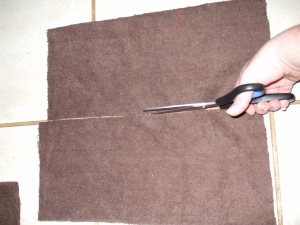
Step 5. Cut the towelling into lenths that suit your needs (mines 40cm long and 20cm wide) Make sure the bear head is in proportion to the towelling.
 |
| Cutting up the towelling |
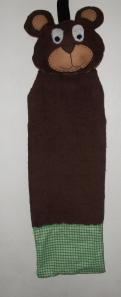
Step 6. Measure and cut a pieace of material to add to the bottom of the towelling to finish it off. I used a scrap of green patterned material which i simply folded in half to make a 20cm wide and 10 cm long rectangle. With the wrong side facing out sew around the sides and bottom but leave the top open. Put the rectangle out the right way so the stiching is hidden and put the end of the towelling into the opening and sew it all together. By now you should have a peice of towelling that looks like this:
 |
| If you dont want a peice like this at the bottom you could use ribbon or fringe or just leave it off... just be careful with beads, etc that may be unsuitable for use around young children |
Step 7. I lined up and added pop studs to the toweling so i can remove the head for washing. I also cut the toweling at the top to make a "neck" for the bear. (you can sew the head straight onto the toweling if you want.)
Anyhoo add the head and your done.
If i haven't explained anything properly please let me know and i will go into more detail... Please let me know if you use it and I've added some links to other burp cloth tutorials if you want to try them.


